
Gmail has introduced email scheduling which lets you create your emails and send them on a specific date and time. This is handy for setting up messages you know you want to send, but don’t need to until later. This short tutorial will walk you through how to schedule emails in the Gmail app on iPhone and iPad.
>>> See more: Turn Off Email Notifications For Mail App On iOS
Schedule emails in Gmail
Open the Gmail app on your iPhone or iPad and then follow these simple steps to schedule your message.
Step 1. Compose your email as you normally would with the recipient, subject, and message.
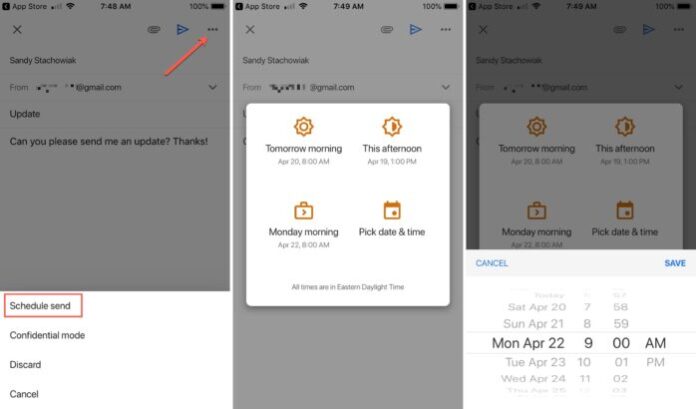
Step 2. Tap the More (three-dot icon) button on the top right.
Step 3. Select Schedule send.
Step 4. In the box that opens, choose when you would like to send the email. You can pick from preset options like this afternoon or tomorrow morning or pick a custom date and time. Choosing a preset will schedule the email with a tap, but if you pick a custom date and time, you’ll need to tap Save to schedule it.
Now you’re set and your email is too.
Check or cancel your scheduled emails
You can also go in and review your scheduled emails and cancel them if needed.
Step 1. Tap the button on the top left to open the side menu.
Step 2. Select Scheduled. You’ll see a number next to it with how many emails you have scheduled.
Step 3. Choose an email to read it or see when it’s scheduled to send. And if you want to remove it from the schedule tap Cancel send. If you cancel sending it, the email will be moved to your Drafts folder.