Your newly purchased computer or the one you just built has Windows 8 installed. You now want to install Windows 7 as a second operating system thus creating a Dual Boot computer and giving you the best of both worlds and full app compatibility as some of your Windows 7 applications may not be supported in a Windows 8 environment.
Considerations before you start:
A) If you purchased your Windows 8 computer:
1 – Installing Windows 7 may void your warranty. Call the PC manufacturer and ask !!!
2 – Installing Windows 7 may render your Windows 8 “Recovery Partition” useless. Before you start, contact the PC manufacturer and obtain the “Recovery media” for Windows 8. Also, ask the manufacturer’s support team about activation when using recovery media as your new computer may no longer have a product key code sticker, Windows 8 uses a BIOS embedded product key for activation.
Partition arrangements on a computer purchased with Windows 8 may vary from manufacture to manufacture. For example a Dell computer could typically have a large number of predefined partitions:
EFI System Partition – 500 MB
OEM Partition – 40 MB
Recovery Partition – 500 MB
Recovery Partition – 10.63 GB
Boot, Page File, Crash Dump, Primary Partition 919.74 (Windows 8 OS C:)
New computers come with a feature called “Secure Boot”. You may need to temporarily disable secure boot in the BIOS before you can install Windows 7. Check your owner’s manual or contact your PC manufacturer’s support team for help on how to do this.
3 – Are there Windows 7 device drivers for your computer’s make and model available from the manufacturer’s driver support download website? If there are no Windows 7 device drivers then installing Windows 7 may be a waste of time as your Display, Touchpad, Camera, USB and other devices may not function properly.
B) If you have built your own computer:
1) Verify there Windows 7 device drivers for your motherboard’s make and model available from the manufacturer’s driver support download site. There is a good chance there are Windows 7 drivers and in fact less of a chance there are a full set Windows 8 drivers for older motherboards. More recently released boards will support XP, Vista, Windows 7 and Windows 8. The assumption however is that you already have Windows 8 installed as your first operating system on the disk drive.
Conceptual overview:
1) This article is based on a home-built computer using a 1TB hard drive.
2) The free version of EaseUS Todo Backup will be used to create an image backup of the drive to an external USB drive before starting. Todo supports both Windows 7 and Windows 8.
3) You need to shrink the Windows 8 partition to make room for a Windows 7 partition. For this task you will use Windows 8’s ‘Disk Management’. To access Disk Management, open the ‘Desktop’ and press the Windows key + X, then select ‘Disk Management’.
4) You will need to disable Windows 8’s ‘Fast Startup’ option before you install Windows 7.
Why disable ‘Fast Startup’:
Failure to disable the fast startup option can result in ‘Check Disk’ (chkdsk) running when installing Windows 7. You may also no longer see the dual boot menu the next time you turn on your computer. Also if you have more than 1 disk drive chkdsk will run each time you shut down from within Windows 8 and then boot to Windows 7.
Fast Startup in Windows 8 is designed to close and reopen by fast booting (Hybrid Boot), it has left your system in a partially hibernated state, with the drive mounted and according to Microsoft “effectively saving the system state and memory contents to a file on disk (hiberfil.sys) and then reading that back in on resume and restoring contents back to memory.”
Turning off the “fast startup/hybrid boot” option fixes the chkdsk problem during the installation of Windows 7, the missing boot menu problem (more on this later) and the multiple disk drives “Dirty bit” issue when booting to Windows 7.Windows 8 may take little longer to boot but not all that much as to be meaningful. Boot times for Windows 7 are unaffected and the boot menu will be displayed each time you turn on or reboot the computer.
How to disable ‘Fast Boot’:
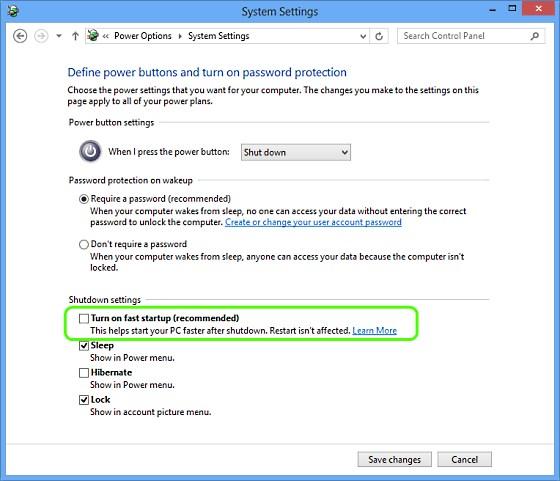
Make the following changes to the Windows 8 Power Options.
1. Control Panel –> View by: Small Icons –>Power Options
2. Select “Choose what the power button does” on left hand side.
3. Click on “Change settings that are currently unavailable”.
4. Uncheck “Turn on fast startup” under shutdown settings.
5. Click on the ‘Save changes’ button.
Create an Image Backup:
Before you make any changes to your Windows 8 computer, create an image backup. Its your safety net should something go wrong. I used the free version of EaseUS’s Todo Backup and an external USB drive to store the image file.
EaseUS Todo Backup: http://www.todo-backup.com/products/home/free-backup-software.htm
Note: The Image should include “All” partitions on your disk drive. Therefore use the Disk and Partition backup option and not the ‘System Backup’ option. Click on the left edge of the image of the disk’s partition map to select the entire drive (this will highlight the entire drive in a golden box. Change the destination to your USB drive. Note: You can create a unique destination and folder name for each backup you create by clicking on the File Explore (formerly called “Windows Explorer”).
Using Disk Management to create a partition for Windows 7:
1) Open Windows 8’s ‘Disk Management’ (press and hold the ‘Windows’ key and tap the X key). Then select the ‘Disk Management’ (or tap the ‘K’ key) option from the list.
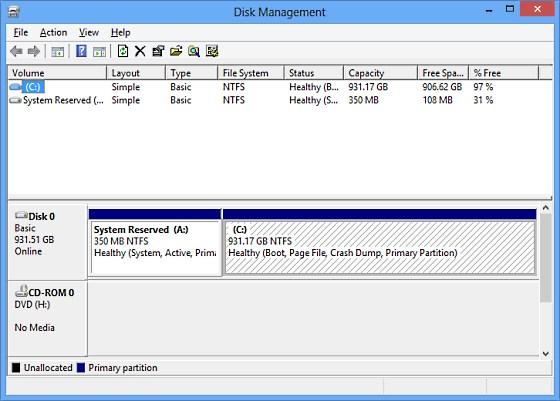
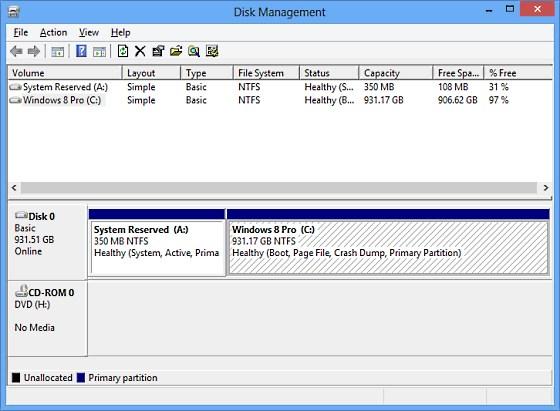
2) Change the ‘Volume name’ to “Windows 8 Pro” (Without the quotes). Right click on the Windows 8 partition (C:) and select ‘Properties’. In the ‘General’ tab change the existing name to: Windows 8 Pro and click the ‘Apply’ button.
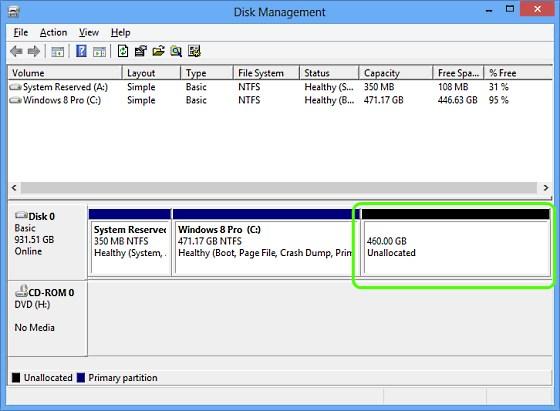
3) Shrink the Windows 8 partition to create unallocated space for use when installing Windows 7. Right click on the Windows 8 partition (C:) and select the ‘Shrink Volume’ option. Now enter a value for the amount of space to shrink in MB. For the 931GB partition in this example I wanted to create a 460GB partition for Windows 7, so I entered a value of 471040 (460 X 1024). If your Windows 8 partition contains a lot of data you want to consider a smaller partition size for Windows 7 (75 to 100GB).
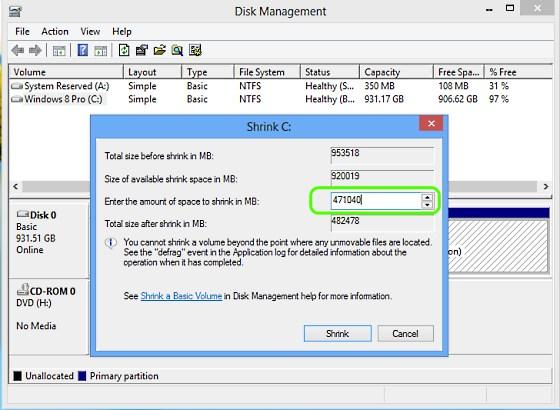
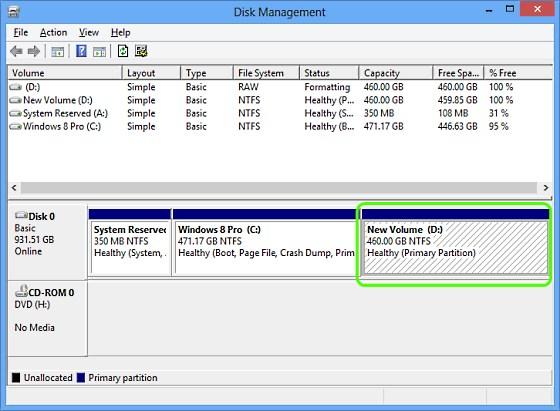
Click the ‘Shrink’ button to start the process. After the shrink operation has completed you will see 460.00GB in “Unallocated” space.
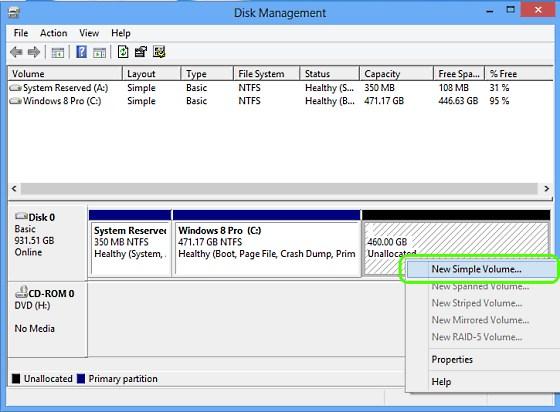
4) Create a “Primary” partition and format it. Right click on the unallocated space and select ‘New Simple Volume’.
In the “Format Partition” window you want an ‘NTFS’ partition, leave the allocation unit size set to ‘Default’ and either choose a ‘Quick’ or ‘Full’ format. I prefer a full format (takes longer to complete, but it’s safer) so as the screenshot below shows, the ‘Perform a quick format’ option is unchecked. Click ‘Next’ to continue.

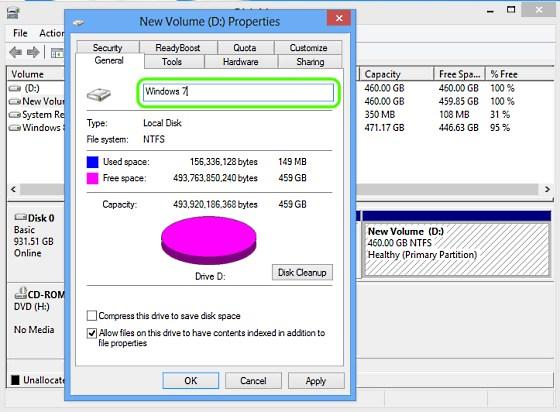
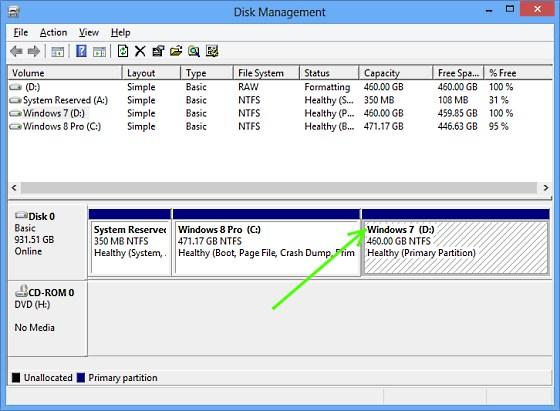
5) Change the volume name to Windows 7 (or Windows 7 Pro or Windows 7 Ult if Home Premium is not what you are installing). This will make it easy for you to select the proper location on the drive during the Windows 7 installation process.